


Taste of Summer Celebration from the OFG Team on Etsy


Pineapple Coconut Pie OH MY!!!
Make this for company--otherwise you may be tempted to eat it all yourself!!!
Pineapple Coconut Pie

 Ingredients


2 cups Pecan Sandies, crushed (about 16 cookies)
1 cup sweetened flaked coconut
¼ cup butter, melted
⅓ cup sugar
2 tablespoons cornstarch
1 (8-ounce) can crushed pineapple in juice
1 (8-ounce) package cream cheese, softened
1½ cups cream of coconut, divided
2 large eggs
1 cup whipping cream
Instructions
Preheat oven to 350. Stir together the cookie crumbs, shredded coconut and melted butter, and press firmly onto the bottom and up the sides of a 9-inch deep dish pie plate. Bake 9 to 12 minutes, or until lightly brown. Remove to a wire rack and allow to cool completely.
Meanwhile, stir together your sugar and cornstarch in a small saucepan; add in crushed pineapple (and juice). Stir constantly, and allow mixture to come to a boil. Cook for 1 minute or until thickened. Remove from heat and allow to cool, approximately 20 minutes.
With an electric mixer, beat cream cheese with the whisk attachment until smooth. Add in 1 cup of cream of coconut and beat at low speed until just blended. (Chill the remaining ½ cup of cream of coconut until ready to use.) Add eggs, 1 at a time, until just blended.
Spread your cooled pineapple mixture over the bottom of your crust. Next, spoon cream cheese mixture over the pineapple mixture.
Bake at 350 for approximately 40 minutes, or until set. Cool completely on a wire rack. Cover and chill 4 hours. Beat your whipping cream until foamy. Add remaining ½ cup cream of coconut and continuing beating, until soft peaks form. Spread over your pie, and garnish with coconut chips, toasted coconut, and pineapple, if desired.
PRIMS Magazine Spring/Summer 2015
Visit My Rare White Crows in the Spring/Summer 2015 Issue of Prims Magazine. Pages 12 to 15


Prims WInter 2015
Come visit my Yellow billed Magpies in the wonderful 2015 Winter edition of Prims Magazine!


Ladies POKER PUFF Valentine's Day Party
Did you have a Valentine's Day Party or event?
I had a group of friends over for a little card playing,gossiping and some refreshments.
My Big Love Bug held the welcome Sign.
 The light over the table was decorated.
 The entry counter had pink and red heart lights with a heart foil centerpiece.
 The refreshment table was festive!
 Ever wonder what to do with the old bed springs you've been collecting (besides crafts?)Paint the springs after thorough cleaning. Make festive card stock paper cones topped with paper doilies.
 Make homemade caramel corn with cashews, pecans and dried cherries inside. Fill those paper cones up with that!
 Also make some white chocolate/M&M's candies and some cherry centered truffles for more Yummy things!
 Make personalized ornaments and little goodie boxes to take home.
 Final touch! An incredible dessert! Raspberry, Chocolate Mousse Cake.Four layers: Cake-like Brownie, Chocolate mousse, Raspberry Mousse and Vanilla Mousse on top.

 Each slice add extra raspberry sauce.
 Voila!! Stuffed Friends!! Want to come next year???


 Make homemade caramel corn with cashews, pecans and dried cherries inside. Fill those paper cones up with that!

 Make personalized ornaments and little goodie boxes to take home.
 Final touch! An incredible dessert! Raspberry, Chocolate Mousse Cake.Four layers: Cake-like Brownie, Chocolate mousse, Raspberry Mousse and Vanilla Mousse on top.

 Each slice add extra raspberry sauce.
 Voila!! Stuffed Friends!! Want to come next year???
Tuesday Tutorial......Handmade Art Fair
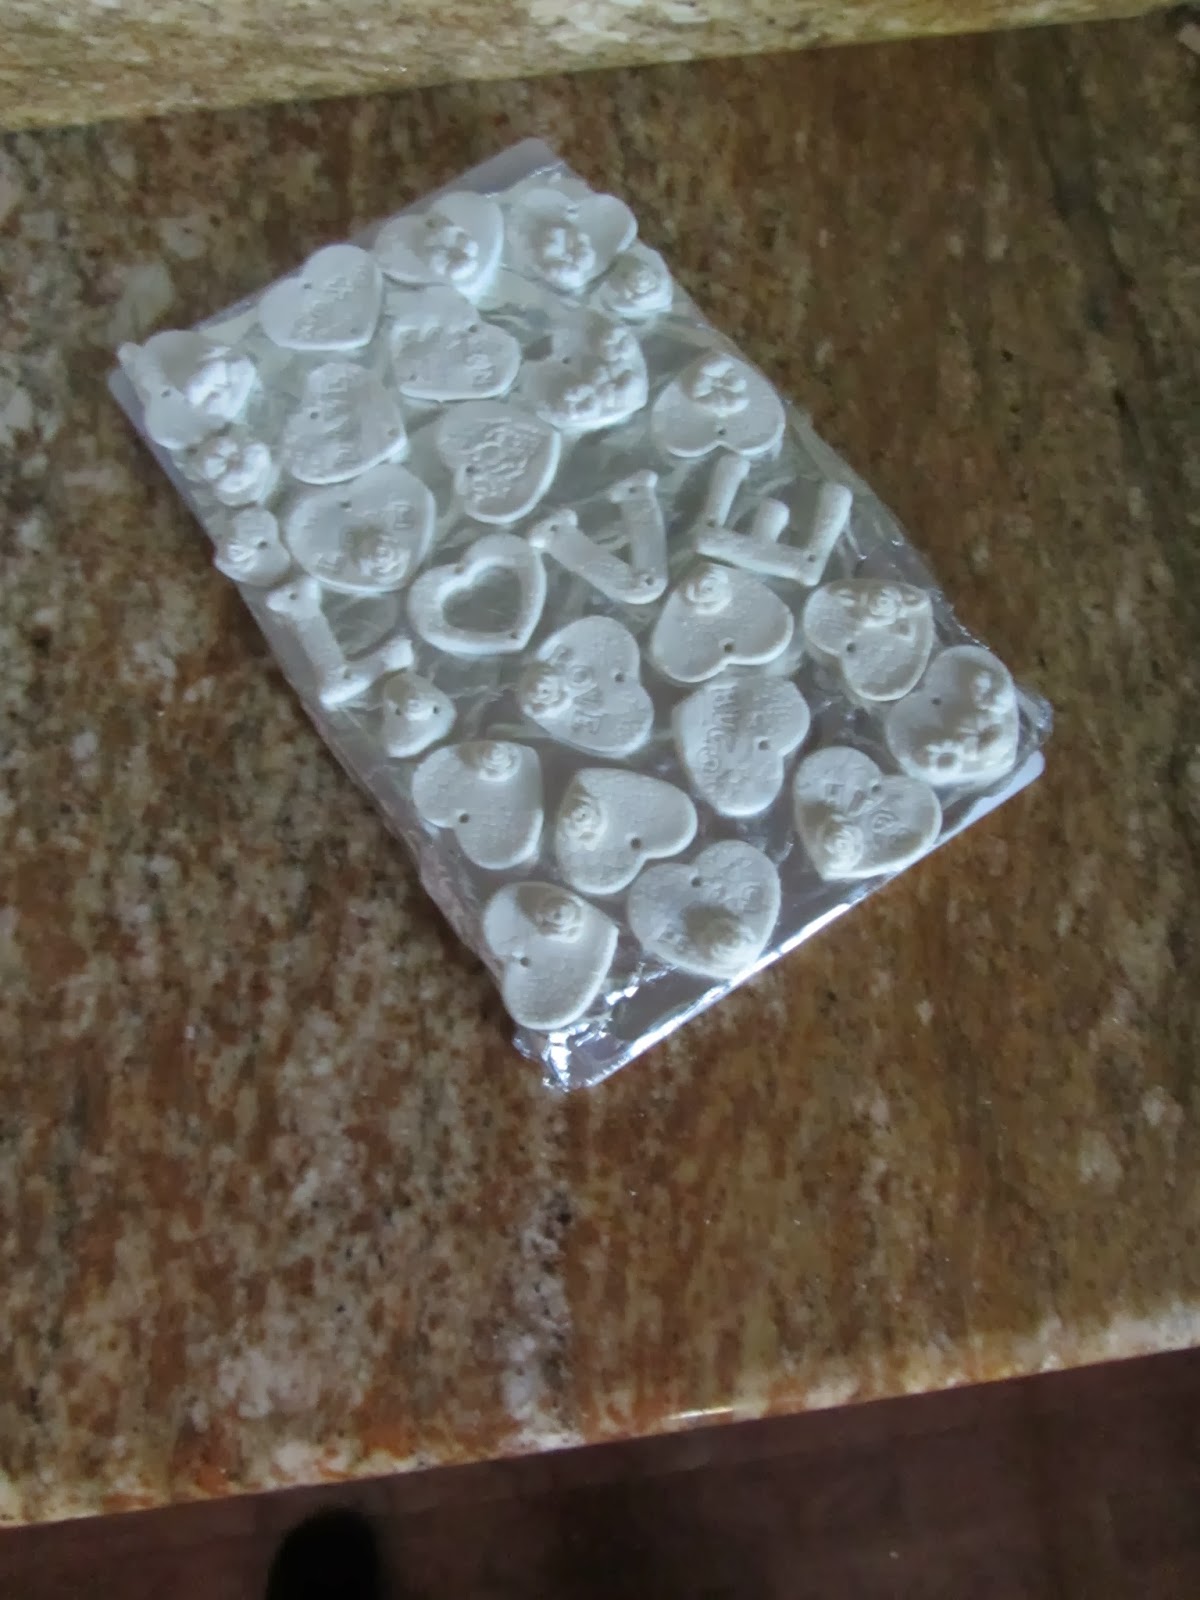
Make Valentine Ornaments or Bowl Fillers
 These are fun to make for Valentine's Day Ornaments or Bowl Fillers. You can also make them all year long and they are GREAT for Christmas Ornies. Tied to a package as a Hang Tag they are impressive.
A basic Cold Porcelain Clay is easy and inexpensive to make.
Assemble all the ingredients and assemble tools needed: Cookie Cutters, glass or plastic bowl, wooden spoon, measuring cup and spoons.
 Cold Porcelain Recipe...Recipe can be cut in half
2 Cups Cornstarch
2 Cups Elmers Glue
1 Tbsp. Lemon Juice
1 Tbsp. White Acrylic Paint (I use Gesso)
2 Tbsp. Baby Oil
Mix all ingredients thoroughly. Mix to remove all Lumps.
 Place in microwave and cook for 1 minute. Stir. Check and cook for 30 seconds. Stir continue to cook in 30 second sessions. I cook for a total of 3 1/2 minutes. Clay is finished when it clumps together.
 When cool enough: Add 1 Tbsp. Cold Cream --like Pond's (non-greasy with no lanolin)
 Turn out onto a non-stick surface and knead thoroughly for 5-7inutes.
 Divide into 2 batches and roll into coils. Wrap in plastic wrap and store in a jar with an airtight lid.
 Roll clay out on a non-stick surface-like a piece of plastic doily. (This also adds texture!) I put dowels or paint stir sticks on either side of the clay to make the thickness around 1/4 inch" thick. Too thick will dry slower and thinner will sometimes warp.
 Use cookie cutters to cut out shapes. Place a hole for hanging, if making ornaments.
 Molds make roses and other embellishments. Put a small amount of white glue on the back before placing on cut-out.
 Add texture for interest. Use stamps to make words.
Let Ornaments air dry until firm. Turn ornaments over occasionally to prevent warping.
 This is 1/2 recipe of Clay.
When completely dry paint any way you want. Seal with acrylic sealer either matte or gloss.




We have a wonderful get-together in my neighborhood.
Eight lovely ladies come over once a month to share
thoughts, fun times and refreshments.
I always want to bake something special for them.
It was my time to host this get-together. I saw this lovely recipe on Pinterest for Key Lime Cake.
I adjusted the flour for high altitude.
Well, 17 hand squeezed limes later all three pans went
into the oven. I peeked in several times and it was
not only NOT rising, it resembled a sunken volcano!
I've made a bunch of cakes over the years and
this was by far the ugliest!
I tried to "glue" it together with icing but the more
I tired the more it looked like a Troll Lime Slime cake !
(It did taste wonderful if you didn't look at it!!)

Fortunately, I had all the ingredients for Strawberry Cake (Fresh or Frozen.)

I topped my icing with "glittered" sugar: 1/2 Cup sugar
+ food coloring-dried in a 350 oven and then crushed.
Sprinkled on top of icing.

I also "smooshed" about 2 more cups of strawberries and added a
little sugar. Before putting slice on the plate , it was drizzled over the plate.

Looks a lot better than the Troll Lime Slime Cake!

Subscribe to:
Posts (Atom)


